Akai AHC1200 Owner's Manual Page 1
Browse online or download Owner's Manual for Home cinema systems Akai AHC1200. Akai AHC1200 home cinema system User Manual
- Page / 24
- Table of contents
- TROUBLESHOOTING
- BOOKMARKS
- SAFETY INSTRUCTIONS 2
- IMPORTANT SAFETY INSTRUCTIONS 3
- TABLE OF CONTENTS 4
- DISC FORMATS 5
- ACCESSORIES 6
- REMOTE CONTROL 6
- CONTROL REFERENCE GUIDE 7
- CONNECTIONS 10
- ADJUSTING THE SOUND 13
- PLAYING A DISC 14
- SPECIAL FUNCTION 16
- REPEAT PLAYBACK 17
- DVD PROGRAMMABLE MEMORY 18
- VIEWING JPEG FILES 18
- Language 20
- RADIO OPERATION 21
- MAINTENANCE 22
- TROUBLESHOOTING GUIDE 23
- 811-ST8291W781 24
Summary of Contents
- 10 -Some TVs or monitors are equipped with component video inputs. Progressive output (DVD)Some TVs or monitors are equipped with Component Video in
- 11 -CONNECTIONSB. Connecting a VCRWatching a videotape1. Turn on the unit. Use the FUNCTION button on the remote control or the front panel to sele
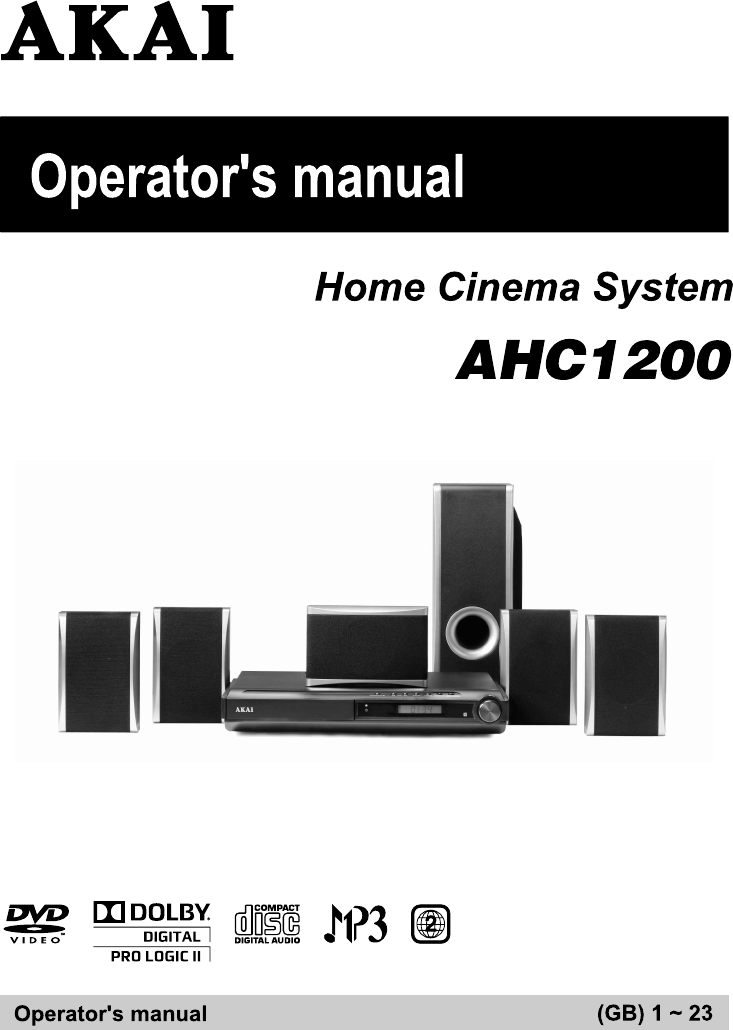
- 12 -CONNECTIONSD. Positioning the Speakers and SubwooferE. Connecting the Speakers and Subwoofer6 speaker wires supplied. Both ends of each speker w
- 13 -CONNECTIONSPlugging in the Unit• Ensure all the components and speakers are connected correctly.• Be sure the AC power cord is disconnected an
- 14 -This owner’s manual explains the basic instructions for operating this unit. Some DVDs are produced in a manner that allows specifi c or limited
- 15 -Slow-motion play (DVD)1. Press the SLOW button on the remote in play mode.• Four speeds are available. Each time the SLOW button is pressed
- 16 -SPECIAL FUNCTIONDISPLAY functionUsing the DISPLAY button, you can check the current settings of the following items: Time, Title/Chapter, Audio,
- 17 -You can play a specifi c title or chapter repeatedly. (Title repeat, chapter repeat, A-B repeat) (DVD)Repeating a ChapterYou can play the same ch
- 18 -DVD PROGRAMMABLE MEMORYDVD Programmable Playback You can combine your favorite titles/chapters and play them in the order you determine.1. Pres
- 19 -When playing CD/JPEG discs, you can modify the Play Modes through the Toolkit which appears on the right side of the window. Press the or bu
- 2 -SAFETY INSTRUCTIONS* SEE REAR OF UNIT FOR GRAPHIC SYMBOLS *The lightning flash with an arrowhead symbol, within the equilateral triangle, is inte
- 20 -CUSTOMIZING THE FUNCTION SETTINGSAudio1. Press the SETUP button.2. Press the or to select Audio.3. Press the button, then press the or b
- 21 -RADIO OPERATION1. Press the FUNCTION button to select RADIO.2. Press the STOP button on the front panel or the BAND button on the remote contr
- 22 -Cleaning the DiscA defective or soiled disc inserted into the unit can cause sound to drop out during playback.Handle the disc by holding its in
- 23 -Specifications and external appearance are subject to change without notice.TROUBLESHOOTING GUIDESYMPTOM CAUSE (AND REMEDY) •
For more information and warranty conditions,please visit : www.akai.euDisposal of Used Electrical & Electronic EquipmentThe meaning of the symbol
- 3 -IMPORTANT SAFETY INSTRUCTIONSSAFE USE OF YOUR EQUIPMENTHere are a few tips to help you do this:READ this instruction manual before you attempt to
- 4 -TABLE OF CONTENTSSafety Instructions ... 2Important Safety Instructions... 3Table of Contents ...
- 5 -DISC FORMATSThe unit can playback discs bearing any of the following marks: Region Management InformationRegion Management Information: This uni
- 6 -ACCESSORIESRemote control (with batteries) ...x 1Audio/Video
- 7 -CONTROL REFERENCE GUIDERemote Control1) OPEN/CLOSE button Use to open or close the disc tray.2) I/ STANDBY/ON button Turn the unit on and pu
- 8 -CONTROL REFERENCE GUIDEFront and Top PanelRear PanelNote: Screen saver - If no button is pressed within 3 minutes, the function will activate. If
- 9 -A. Connecting your TVThe unit can be connected to your TV in several different ways, depending on the design of your TV.Notes:• Connect the unit
© 2020, manymanuals.com. All rights reserved. | 0.484 s |
 Manymanuals.com
 Manymanuals.de
 Manymanuals.fr
 Manymanuals.it
 Manymanuals.pl
 Manymanuals.cz
 Manymanuals.es
 Manymanuals-pt.com
Comments to this Manuals