Akai MPC 1000 User Manual Page 58
- Page / 120
- Table of contents
- BOOKMARKS
- Version 2.0 1
- CAUTION 2
- IMPORTANT 4
- FCC WARNING 5
- VENTILATION 5
- COPYRIGHT NOTICE 5
- Chapter 12: Program 66 8
- Chapter 13: Mixer 79 9
- Chapter 14: Effect 83 9
- Table of contents 10
- Operator’s Manual 11
- Chapter 1 : Introduction 12
- HOTCOLDGND 14
- Headphone 15
- Footswitch 15
- Compact Flash 15
- Terminologies in MPC1000 16
- Drum Pad 17
- Program 17
- Note Number 17
- Memory Card 18
- Chapter 2 : Basic Operation 19
- Setting names 20
- Entering numbers with 21
- NUMERIC key 21
- Chapter 3 : Sequencer feature 22
- Recording the performance 23
- Playing back a sequence 24
- Other useful features for 24
- Timing correct feature 25
- Click/Metronome feature 26
- Note repeat feature 27
- • Note Repeat Hold 27
- Punch In/Punch Out feature 27
- Detailed information on 28
- Changing the sequence name 29
- Chapter 3: Sequence feature 30
- Track features 31
- Track velocity feature 32
- Track mute feature 32
- Changing a track name 32
- Copying a track 33
- Deleting a track 33
- Deleting all tracks 33
- Solo function of a track 33
- MIDI sequencer features 34
- Handling the sustain pedal 35
- Chapter 4 : Editing sequences 36
- Moving events (MOVE) 37
- Chapter 4: Editing sequences 38
- Copying bars (COPY) 39
- Changing the order of tracks 40
- (TRACK MOVE) 40
- Chapter 5 : Step editing 41
- Basic operation 42
- Pad event 42
- Tempo change event 43
- Effect select event 43
- Real Time event 43
- Chapter 5: Step Edit 44
- Copying / pasting an event 45
- Moving an event 45
- Deleting an event 45
- Inserting an event 46
- Chapter 6 : Song mode 47
- Creating a song 48
- Playing a song 48
- Other features in the SONG 49
- Note : During Song Conversion 50
- MUTE TRACKS IGNORED) 50
- Playing with pads 51
- TRACK MUTE Screen 52
- Solo function 52
- Selecting a sequence to play 53
- Chapter 8 : Q-Link slider 54
- Recording the slider value in 55
- AFTER key 55
- Feature in TRIM mode 56
- Feature in MIXER mode 56
- Chapter 9 : 57
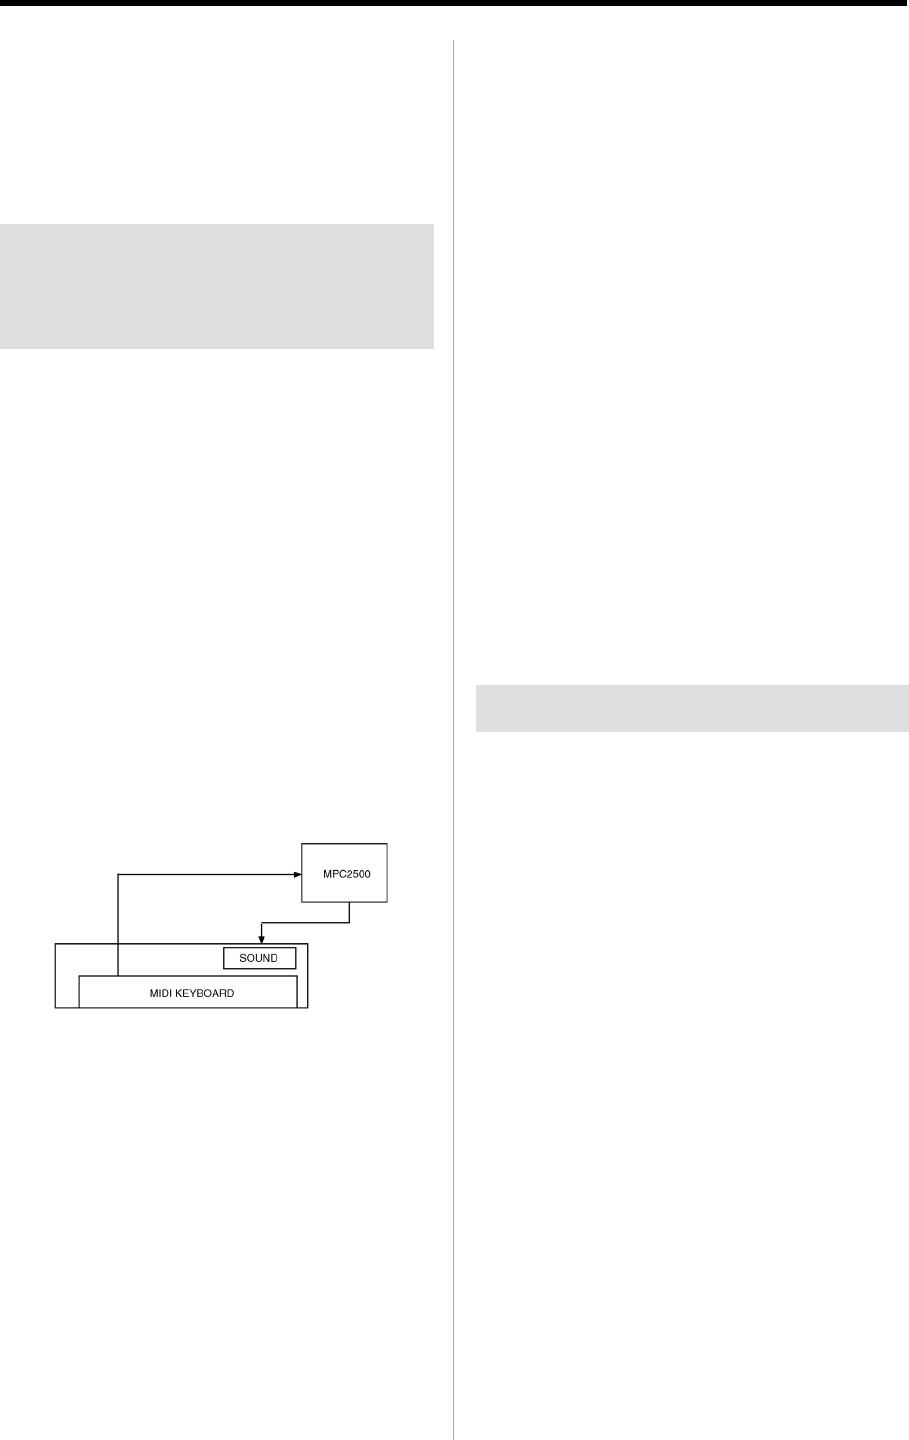
- Connecting the MPC1000 to 58
- Setting the MIDI input 58
- Changing a sequence by 59
- Program Change from an 59
- Preparing the recording 60
- Starting the recording 60
- Recording the sample 61
- Recording the digital signal 61
- Recording the MAIN OUT 61
- Other Features 62
- Chapter 11 : Editing a sample 63
- Chapter 11: Editing a sample 64
- Silencing a range selected 65
- Saving part of a sample as a 65
- Sample window features 65
- Other editing functions 66
- Dividing a phrase sample 69
- Converting Divided samples 72
- Converting PATCHED PHRASE 72
- Editing a Patched Phrase 73
- Setting the loop 74
- Linking the loop point to the 75
- Chapter 12 : Program 76
- 68 Chapter 12: PROGRAM 78
- Setting the Amp Envelope 79
- 70 Chapter 12: PROGRAM 80
- The functions in the Program 81
- Editing the sound of a sample 82
- Limiting the number of the 83
- Simulating the open/close hi 84
- Setting the overlap of the 84
- (voice overlap) 84
- Editing a pad sample 85
- 76 Chapter 12: PROGRAM 86
- Setting a LFO (Low Frequency 87
- Oscillator) 87
- 78 Chapter 12: PROGRAM 88
- Chapter 13 : Mixer 89
- Mixer Automation 90
- Shortcut between MIXER 90
- Input Thru function 91
- Using Q-Link feature in 92
- INPUT THRU mode 92
- Chapter 14 : Effect 93
- Applying effects of the FX2 94
- Editing effects 94
- PHASE SHIFTER 95
- TREMOLO 95
- FLYING PAN 95
- CHORUS and FLANGER 96
- Using the master effect 97
- Editing the master effects 97
- Editing the effect set 97
- Chapter 15 : Save / Load 99
- Creating a new folder 100
- Saving a sample 100
- Saving a program 100
- Saving a sequence 101
- Saving data to the internal 102
- Loading a file 103
- MPC3000/2000/2000XL 104
- Loading a sequence 105
- Loading the ALL file 105
- Loading a folder 105
- Renaming a file 106
- Deleting a file 106
- Formatting the memory card 107
- Connecting the MPC1000 108
- to the Macintosh 108
- Chapter 17 : Other settings 110
- Initialize to Factory Preset 111
- Adjustment of Pad Sensitivity 111
- Chapter 17 : Other Settings 112
- Specifications 113
- Standard accessories 114
- Data Compatibility 114
- Preset program list 115
- MIDI Implementation Chart 116
- 108 INDEX 118
© 2020, manymanuals.com. All rights reserved. | 0.348 s |
 Manymanuals.com
 Manymanuals.de
 Manymanuals.fr
 Manymanuals.it
 Manymanuals.pl
 Manymanuals.cz
 Manymanuals.es
 Manymanuals-pt.com
Comments to this Manuals