6 Version 1.01-Addendum
MANUAL ADDENDUM
COMPILE PROJECT PAGE
When working with multiple disk drives on a single machine connected to the RE32, you may have
the situation where a project is created using audio taken from several of these external drives.
During the track laying process, you will probably be playing this audio directly from each of these
disks but, ultimately, you may wish to create a ‘self contained’ master disk that contains all the
audio elements used in the project. In other words, you want to ‘compile’ your project.
The COMPILE function on the RE32 is a special type of save routine and is used to create one
‘master’ disk for a project to be played from. Without COMPILE, if you were to remove the project
disk and try to play it back without the other disk(s) also being on-line, any cues in the project that
were created on one of the ‘missing’ external disk(s) would not be played. COMPILE overcomes
this by copying all audio referenced in the project from the appropriate disk(s) onto the one ‘master’
disk. After the project has been compiled, all cues will play back successfully from this master
disk..
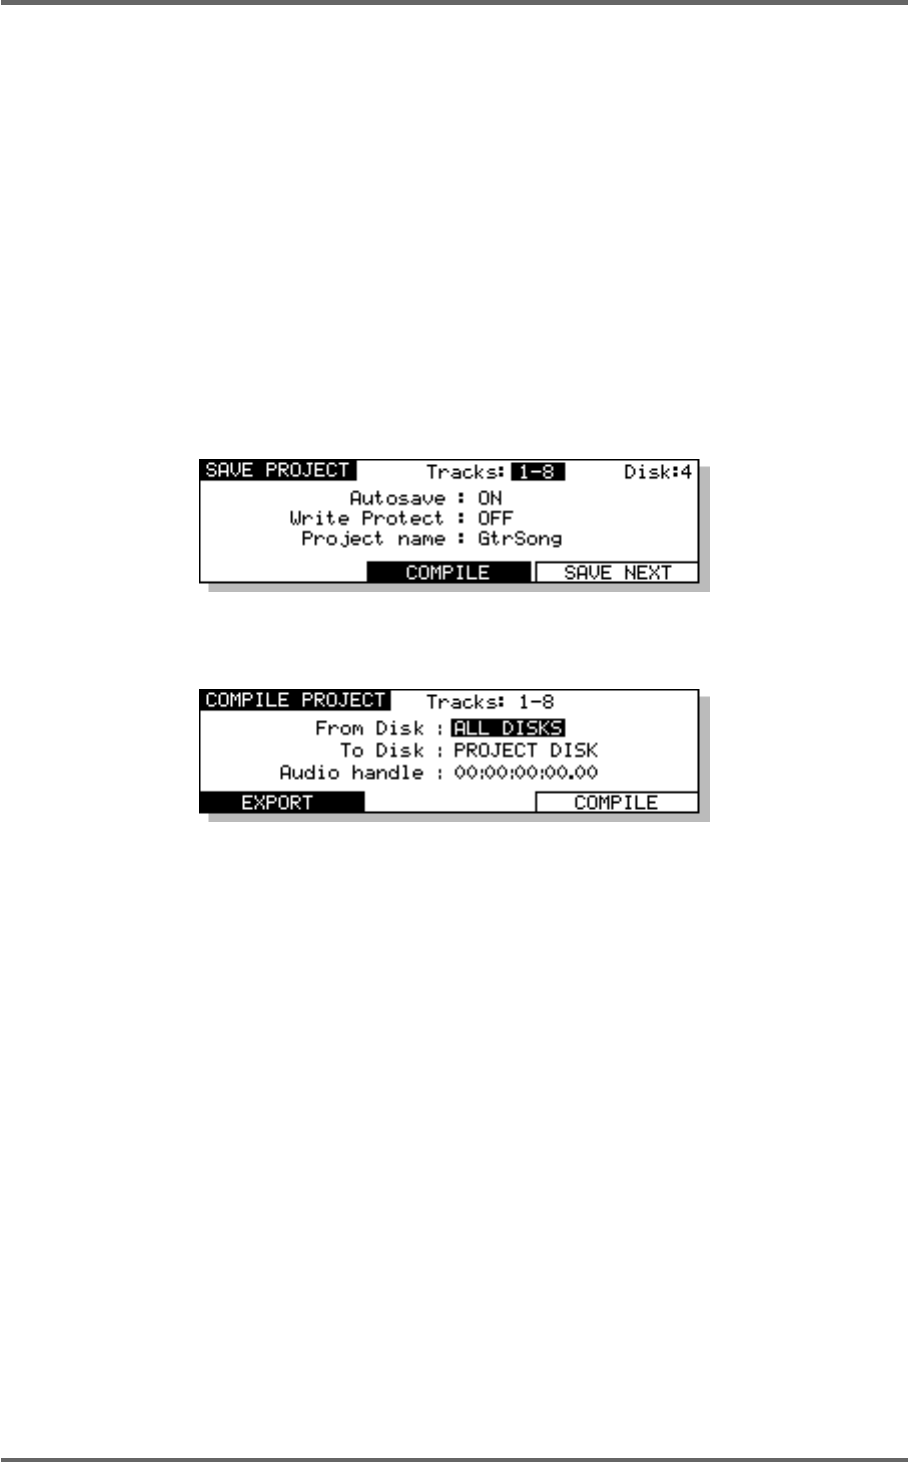
The COMPILE function is accessed from the SAVE PROJECT page:
As the COMPILE function works on a specific machine, the COMPILE option (F3/F4) is only shown
when a single machine is selected in the TRACKS field. Pressing this soft key will take you to the
following page:
The parameters on this page are:
FROM DISK This parameter selects which disk(s) will be included in the compile
process. This can be selected between ALL DISKS and Disk IDs 0 to 6.
TO DISK This parameter selects the destination disk for the result of the compile
process. This can be selected between PROJECT DISK and Disk IDs 0
to 6.
AUDIO HANDLE The compile process only copies sections of audio that are actually used
in the source project to the destination disk. This parameter determines
how much extra audio before and after the used audio will also be copied..
To compile a project, press COMPILE (F5/F6). The selected machine will scan the source project,
find out which bits of audio are being used and which disks they come from and will copy the
relevant pieces of audio across. However, please note that because audio is being copied from
the external disk(s), compiling a project can take some time. Exactly how long depends on the
amount of audio that needs to be copied. As each piece of audio is copied across, a bar at the
bottom of the screen will be highlighted to indicate progress.
When creating projects using clips from external disks, it is recommended to use COMPILE to
prevent the possibility of audio becoming separated from the project. However, please note that
because you are copying audio across, you will use up more disk space on the ‘master’ disk so
you should make sure you have enough free disk space to allow for this.
 Manymanuals.com
 Manymanuals.de
 Manymanuals.fr
 Manymanuals.it
 Manymanuals.pl
 Manymanuals.cz
 Manymanuals.es
 Manymanuals-pt.com
Comments to this Manuals