Akai AM820CRL Instruction Manual Page 7
- Page / 13
- Table of contents
- BOOKMARKS
- INSTRUCTION MANUAL 1
- Microwave Oven 1
- ADDENDUM 2
- TO EXCESSIVE MICROWAVE ENERGY 2
- IMPORTANT SAFETY INSTRUCTIONS 3
- Grounding Installation 4
- CLEANING 4
- UTENSILS 5
- SETTING UP YOUR OVEN 6
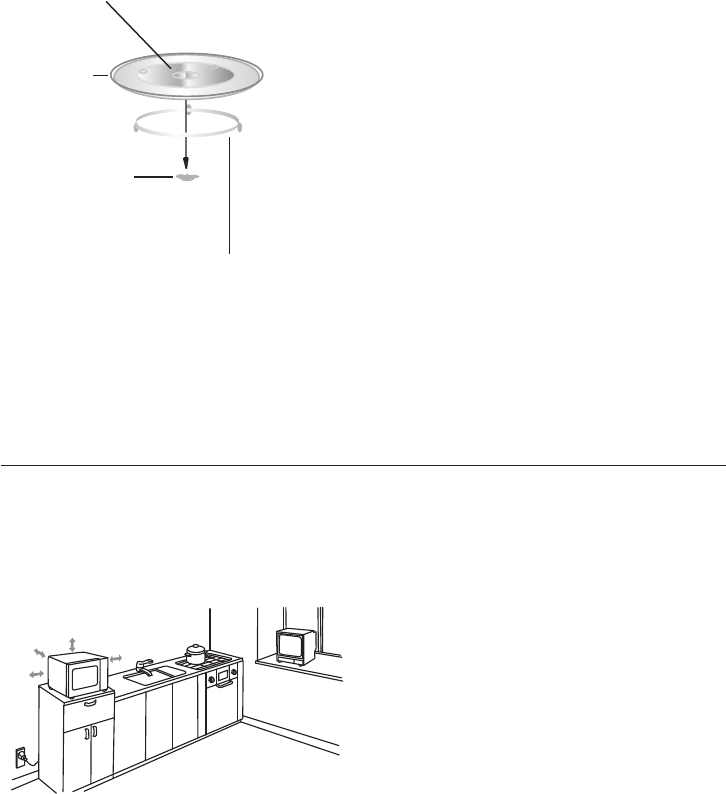
- Countertop Installation 7
- Installation 7
- Turntable Installation 7
- OPERATION INSTRUCTION 8
- 6.Multi-Stage Cooking 9
- 3. Speedy Cooking 9
- 4. Defrost By Weight 9
- 5. Defrost By Time 9
- 7. Pre-set Function 10
- 9. Auto Menu 10
- Auto Menu 11
- 11. Specification 12
- 10. Inquiring Function 12
- Trouble shooting 13
Related products and manuals for Microwaves Akai AM820CRL
 (8 pages)
 (9 pages)
(13 pages)
(20 pages)
(20 pages)
(23 pages)
(20 pages)
(9 pages)
(15 pages)
(10 pages)
(15 pages)
(10 pages)
(10 pages)
(12 pages)
(10 pages)
(9 pages)
(13 pages)
(20 pages)
(20 pages)
(23 pages)
(20 pages)
(9 pages)
(15 pages)
(10 pages)
(15 pages)
(10 pages)
(10 pages)
(12 pages)
(10 pages)
© 2020, manymanuals.com. All rights reserved. | 0.618 s |
 Manymanuals.com
 Manymanuals.de
 Manymanuals.fr
 Manymanuals.it
 Manymanuals.pl
 Manymanuals.cz
 Manymanuals.es
 Manymanuals-pt.com
Comments to this Manuals